Monday, April 22, 2013

Duck Tape Creations!

Duck Tape Clutch Tutorial 


Materials needed: 
Duck Tape
X-Acto Knife
Velcro
Cutting Mat


First thing you need to do is make Duck Tape® fabric. 

1. You can make your clutch in as many different colors as you like. First lay out the duck tape on a flat surface sticky side up. Make sure you overlap your Duck Tape® just a little bit, so you have a strong bond.

2. Then over the top you can layer colors cool sticky side down.
3. Trim the edges with an X-ACTO knife & a ruler.

4. Now you have a great piece of Duck Tape® fabric to work with. :)

The rest is pretty easy. Fold one end up. Leaving a little on top for the clutch's flap.

Then tape up the edges.. Isn't that a fun print on the inside?

Then add some sticky back Velcro on the front flap so it will stay in place when closed.
Then add a fun handle on the clutch made with the two different kinds of Duck Tape® stuck together & trimmed down just a little.
And then your Duck Tape clutch is finished! How cute!

All supplies needed for this project can be purchased at our store.
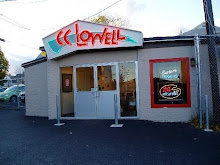
CC Lowell
258 Park Ave
Worcester, MA
508-757-7713


Monday, April 15, 2013

Image transferring.....it's easier than it looks!

TRANSFERRING AN IMAGE WITH GEL MEDIUM

Transfer Image using Gel Medium to Wood or Canvas via lilblueboo.com

Materials:
Golden Gel Medium – Regular (Gloss or Matte)
Canvas or wood
Photocopy (mirror image)

Transferring an Image with Gel Medium via lilblueboo.com
Apply a generous coat of gel medium to the canvas.
Transferring an Image with Gel Medium step 1 via lilblueboo.com
Place your photocopy face down on the gel and smooth gently to adhere well and remove all air bubble. 
Transferring an Image with Gel Medium step 2 via lilblueboo.com
Allow the gel to dry completely for about an hour. Then dampen the back of the photocopy with water……
Transferring an Image with Gel Medium step 3 via lilblueboo.com
……and use your fingers to rub all the paper off.
Transferring an Image with Gel Medium step 4 via lilblueboo.com
The image will be left behind! Now you can seal it, paint over it….endless possibilities!

Transferring an Image with Gel Medium step 5 via lilblueboo.com
All the supplies needed for this project can be purchased at CC Lowell!
Come on down and we will help you get started! 

CC Lowell
258 Park Ave
Worcester, MA
508-757-7713

Friday, April 12, 2013

Plaster Casting Leaves

Plaster Casting Leaves Tutorial 

- Fun for Adults & Kids!

We came across this great project on Pinterest posted by Susan Myers.

This is a fun and easy project for adults, and kids ages 10 and up with help of a parent.

Materials needed for this project:
Several large leaves
Plaster of Paris
Plastic (to protect work surface)
Newspaper
Hemp cording, string, or picture hanging hardware
Step 1: First cover your table in plastic. You can use trash bags or large plastic bags.  Crunch up some newspaper to put under the upside-down leaf to support the center.  (You don’t want your leaf to be flattened by the weight of the plaster).
Step 2: Roll up more pieces of newspaper and put under the edges of the leaves in several places to create nice waves in the leaf.  You will have to use one leaf for every plaster casting as the leaves lose a ton of texture if you try to re-use them.

Step 3: Mix the Plaster of Paris with water in a plastic cup. Add enough water to make the plaster a consistency similar to yogurt. Then spoon the plaster over your leaf. Plaster does not stick to the leaf and in some cases will try to roll off, but be persistent. Try to spread it just to the edges of the leaf, creating a layer of plaster over the leaf that is about ¼  inch thick. Now at this point, add a hanger of some sort into the plaster before it dries. Now allow the leaf to dry for at least an hour. Leaves are fragile and if the plaster has not set completely, it will break into a bunch of leafy pieces. 
Now, flip your mold over and peel off the leaf.
You may have to do some trimming on the edges.  Carefully use a craft blade to score the edges and then snap off the extra in little pieces.  Keep in mind that these plaster leaves are fragile. 


Stop into CC Lowell to get your plaster supplies and x-acto knife for this project!
258 Park Ave, Worcester MA
508-757-7713

Wednesday, April 3, 2013

Revamp, Revamp, Revamp!

Hey, Folks!

So in case you were feeling too clean and pristine today, we dug up a bunch of ideas to help add more splashes (literally) of color to your life!


 This one is really just as simple as pouring paint, but we all know sometimes even the most creative types of people just need that seed planted ;) ...

The Amsterdam brand acrylics we've got would be great for this, since they are nice and affordable and thin enough to drip on their own. We've also got special tips that go with them that make it easier to control where the paint is going. Also the Pro Art Acrylics would be good for the same reason, and you can get these in 2 liter bottles with pumps if you really wanna go to town!
And this is not even to mention everything you could do with the Montana spray paint we stock...


Another quality way to spend your time is to alter clothing with all kinds of different dyeing techniques. Whether it's stuff you already have or stuff you picked up from Goodwill, Savers, Salvation Army, etc...its really pretty amazing what a little dye will do! Martha's got some pointers in the link above, but there's tons more techniques on pinterest, youtube, and the all-knowing Google to get ya goin!

And where might you find this dye? Well, C.C. Lowell of course! We have PLENTY of colors in our Jacquard Procion Dye rack, as well as the extremely user friendly IDye packets you can just throw in the washer with whatever fabric you're dying and be done with (no mess)! We know from both personal and customer experience that once you dye that first shirt, scarf, or bag you start noticing a whole new color potential in pretty much everything you own!

Speaking of new DIY/ color potential in items you may have already, we noticed bags like this one floating around the internet:


This bag has somehow has a retail value of $55,000....clearly, this value comes from its "artsy" chic quality and brand name, but as artists we know that this effect is NOT very difficult to achieve, even if you deem yourself "un-creative" or perhaps happen to be a child!
                                                                

So, whether you're into letting everyone know how artsy you are or just happen to get paint all over everything like we do, make it intentional and pick up some of our Jacquard Lumiere Fabric Paint or mix Golden brand GAC-900 Fabric Medium into any Acrylic to make it flexible and machine-washable. We also have empty spray bottles that you can use to water down these paints to get a nice splatter-effect.

And with that, get down here and start scheming about what you're gonna dye/drip/splatter today! No excuses! We now close at 7pm Wednesday-Friday, and are open on Sundays 12pm-4pm for your convenience!

:)

Friday, March 15, 2013

Smock, Paper, Scissors, Spring!


Everyone knows that first taste of spring sun is enough to get all you creative crafters/artists out of hibernation and into the mood for bright colors and productivity!

We've found some more great crafts inspired by the season that are not only fun for your own entertainment but also for the entertainment of your guests if you will be hosting any festive get-togethers for birthdays or Easter!

First up we have good ole Martha coming through with some simple yet adorable ideas:


Both of these projects are cute and fun for any age. Whip out those decorative papers and fabrics you didn't know what to do with and start cutting! Don't have any? Well, anyone who's been to our store (and this hopefully means you!) knows we have a library of beautiful, surprisingly cheap papers to choose from, as well as a selection of blank Strathmore greeting cards to jump start your creations. We also have plenty of Xacto knives, blades, markers, gel pens, and whatever else you need to make these your own. Not to mention our Buy Two Get One Free sale on any type of open stock paint tubes or brushes ;). We're thinking some nice pastel colored gouache would be a great addition to the card idea! 

And the coffee filter candy dishes (although we don't sell coffee filters or food dye) were just too adorable not to share! We do have plenty of brushes, hot glue guns, scissors, different kinds of non-food-grade dyes, and glitters to spruce it up a bit, though.

Next we've got this awesome idea for a unique table runner:


Again, this idea is begging for the gorgeous cardstocks/papers we have at the store. Some striped or metallic papers would be great with this, but we also have floral and abstract designed papers in vibrant as well as muted colors that would work beautifully! Or even the Cavallini Map papers or tissue papers we've got....but we could go on. Also, if you need a bone folder, come on on down!

And last but not least, for the more fine art/mixed-media oriented crowd we've got another project including (but not limited to) cut paper, dye, paints, and whatever else you can scrounge up:


This piece is a nice inspiration for people of a wide range of age, talent and experience levels. A great exercise in creativity to do with kids, friends, or by yourself is to simply play around with things that are pretty to make something even prettier (because it will be your own!). Flower forms are a very classic, traditional starting template but of course, the possibilities are endless. We've got spray bottles and plenty of beautiful inks (Montana acrylic and dye ink is currently on sale) and Golden Fluid Acrylics that would create some really nice effects. And, what better time to experiment than when our canvas is BUY ONE GET TWO FREE! Yes, TWO FREE! A great pair for our previously mentioned Buy Two, Get One Free paint and brush sale ;)

So, what are you waiting for?! Spring up and get down here to start snipping pretty today!

Tuesday, March 5, 2013

Easter Crafting fun!

So apparently Martha Stewart's got some great craft ideas....who knew?!

And C.C. Lowell has her brand of glitter (a 24 pack of gorgeous, powder-fine vials) in stock to be used on adorable projects such as these:


Not that you can't make basically anything gloriously sparkly with this glitter, but it definitely works great in combination with Easter crafts. Follow the instructions in the link above to get all the details, but its pretty much as simple as glue and glitter. We've also seen this glitter used on shoes, household items, jewelry, etc and it's got AMAZING coverage. Not to mention we also stock Glitter Blast spray paint, ultra-fine Pearl-Ex iridescent pigments, and other assorted glitters to supplement!Why not spruce a plain old item up?


Another adorable Martha craft we found having to do with Easter is this:


SO adorable. All you need is (the idea, which you now have!), dye, and whatever paper, threads, felt, fabric, etc. you've got around the house to make all kinds of cute creature eggs. The link above has tons of great ideas if you can't decide on which creatures you want to bring to life!


If you've got some more crafty ideas you'd like us to share feel free to make a peep ;) we'd love to hear them.

Also feel free to come down to the store to stock up on some more inspiration!


See ya soon!


Wednesday, February 27, 2013

So many awesome alcohol ink projects!

We've been getting a lot of calls for alcohol inks lately, so we figured now it's time to share what some of customers (and the people of the internet) are doing with them!

Here's some of our favorite projects:


All Thumbs Crafts

FAUX STAINED GLASS!

This is one of those really-hard-to-make-ugly projects, because it's so easy to do and almost always comes out with a cool looking effect! You can use alcohol inks in various colors to stain glass (and not just glasses...ANYTHING glass such as jars, figurines, etc.) and then use a straw or canned air to make it spread and blend to your heart's content.

Another similar idea is to do this on coasters:


http://imgfave.com/view/2604575

Same idea and process as the faux stained glass, only it also works anything ceramic or stone! Using a clear alcohol ink or rubbing alcohol will give you a really nice marbleized look when you mix it with other colors. Great for making unique party/wedding decor without paying a fortune (never mind the time it takes to find what fits your aesthetic)!

Using alcohol inks with liquid polymer clay is yet another door-opener for tons of different crafts such as beads, ornaments, sculpture, and anything else you can think of:


Alcohol Ink and Liquid Polymer Clay

This site (along with many others if you google it) has some good techniques for getting great effects out of clay. Also, since it can also be used with glass it really opens the door for some awesome jewelry/bead making ideas! 

And of course, these inks work beautifully in a fine-art setting, and can be used on wood or Ampersand Claybord to create gorgeous effects for backgrounds of mixed media projects or just standing alone as this artist, Andrea Pramuk does:
Andrea Pramuk's Gallery


Hope these sparked your inspiration as much as they have for us! There's SO much potential with these inks, and we always stock Montana Black brand (on sale now) but can also order the Jacquard Pinata brand as well as the alcohol based refills for Copic Markers (which means you can get any color that Copic makes, which is pretty much infinite!)

Have a fun, creative craft filled day!


:)