Saturday, May 11, 2013

Super Simple Screen Printing Tutorial


DIY- Super Simple Screen Printing Tutorial!

What You'll Need:
  • A pre-made screen or silkscreen and an embroidery hoop
  • Screen Filler or acrylic latex paint
  • Inks made for printing on fabric
  • Sponge brush and/or screen printing squeegee  
  • Blank clothing to print on. The closer to 100% cotton it is, the better prints will turn out/take.

Step 1: Create the screen or Buy a Ready Made Screen


You can buy a ready-made screen at our store, or you can make your own screen.

For this, you can use a basic plastic embroidery hoop in whatever size you need for the design, and stretch some silkscreen material through it until it's taut like a drum. 

You can also buy rolls of actual screen printing fabric. I line the inside edge (where the hoop meets the screen) with blue painters tape, so that my filler paint and fabric inks don't get the hoop itself all messy.


Step 2: Create the design


You can draw the design by hand, or make it on the computer, then print it out. Then trace it onto the screen lightly in pencil with the screen laying flat on the paper.


Step 3: Fill the screen


Fill out the screen - in other words, block out all the negative space that won't be printed, leaving only the design unpainted. 

You can purchase items for this process at our store. This is by far the step that takes the most amount of time, particularly if it's a design with lots of small details. Do two coats, and check the screen by holding it up to the light to make sure there are no tiny holes missed. Let the screen dry overnight before doing any printing with it.


Step 4: Print!


Once you got the screen done, decide which piece of clothing I'm going to print on, mix up the color ink you want with different fabric inks, and print. 


The screen goes face-down on the area of the clothing you want to print,  use a layer of cardboard inside the piece of clothing so that if the ink leaks through it doesn't spread to the back of the shirt or whatnot. 


Also just use a sponge brush to apply the ink, pressing very firmly. If you have a small enough squeegee to fit into your hoop size, that is also a good method. But either way you need to make sure your pressure is mostly downwards, not sideways, so the ink gets pressed through the screen and not just moved around on top. Once ink is applied, lift the screen off the fabric, and immediately wash it and the brush fabric inks are water-soluble... until they dry. If the ink is left to dry in the screen, it becomes unusable again. 


If needed, you can touch up areas of the print with a small paintbrush. If you are going to do multiple colors/layers of prints on the same shirt, do all of one color at once, and let that dry (both the ink on the shirt, and the screen you washed out) before doing the next layer/color. Don't proceed to Step 5 until all printing on your shirt is done.


Step 5: Heat-set the ink

This might be the most important step. Once the design is on the shirt and looking great, and the ink has dried, grab an iron and a spare piece of cotton fabric for an interface, and iron BOTH sides of the design on medium-high heat. 


So, once with the shirt right side out, and once with the shirt inside out. Each side gets this treatment for 3-5 minutes. This binds the ink to the fabric, and makes it so it won't come out when you wash it (remember how they're water-soluble? Not so, after this step). It's important to use a cloth interface when ironing on the ink, because otherwise you will end up with a sticky mess of melted ink on your iron.

Step 6: Sport new duds proudly


The new piece of clothing with a custom design is ready to be worn!


-Thanks to Acute Designs for this great little tutorial!

- - -> Silkscreen, pre-made screens, screen printing inks, squeegees, and all other screen printing supplies can be purchased at CC Lowell.

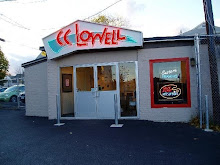
CC Lowell
258 Park Ave
Worcester, MA
01609
508-757-7713

Monday, May 6, 2013

DIY Plaster Hands Using Alginate

DIY Plaster Hands with Alginate!
DIY: A Real Hands On Craft Using Alginate momspark.net
SUPPLY LIST:
pitcher
dry measuring cup
liquid measuring cup
wooden spoon
disposable bowl
alginate
plaster of Paris knife
self adjusting (sawtooth) picture hangers with spikes to push in
DIY: A Real Hands On Craft Using Alginate momspark.net
Step 1: First things first – mixing your alginate and transferring it to your container you will be making the mold in. The manufacturer recommends that you use in a 1:1 ratio with water. For my 8 cup container, I used 7 cups of water and 7 cups of alginate. First pour your water into your pitcher and then follow with your alginate powder and stir vigorously. It will begin to set pretty quickly, so really get it stirred quickly. When you are happy that there are no lumps of powder remaining, pour into your mold container.
DIY: A Real Hands On Craft Using Alginate momspark.net

Step 2: Place your hand into the goo. I mean alginate. Make sure that your model’s hand is not touching the bottom or sides. Also be sure not to go into the goo up to the wrist or beyond. You’ll need to go only as far as the wider portion of the hand – go to the wrist and you may not get out of it. Make your model move their fingers around to make sure that you have alginate settles into all of the little pockets and crevices a hand will make.
Sit tight, about 10 minutes or so, as still as possible while the mold begins to set around the hand. Feel the top of the alginate from time to time. When it’s firm to the touch, your model can remove their hand. First, wriggle the fingers around to loosen and then carefully pull the hand completely out of the mold.
DIY: A Real Hands On Craft Using Alginate momspark.net
Step 3: Mix your plaster of Paris per manufacturers suggestion. Slowly pour the liquid into your mold. About halfway through, roll around the bowl to try and help the plaster up into all of the nooks and crannies. *** NEVER put hands directly into the plaster to form a mold. It won’t work and you’ll lose a finger!

DIY: A Real Hands On Craft Using Alginate momspark.net

Allow the plaster to fully cover the hole – you can break away the extra later – so no worries there. Finish filling up and tap around the sides of the bowl with your wood spoon to help break up any air bubbles in the mixture.
Move the mold someplace warm for about 4 hours. Most plaster says 1 is adequate but I say the longer the better. Besides – the first hand I did fell apart and that was only an hour. Play it safe!
*** When cleaning your pitcher and utensil you used to mix your plaster, DO NOT wash it out in your sink. Take it outside with the hose. You will encounter some nasty plumbing issues if plaster of Paris sets up in your pipes!

DIY: A Real Hands On Craft Using Alginate momspark.net

Step 4: Loosen and remove your mold and cast from its container. You may want to go around and use a towel and soak up any excess moisture that is left on the surface. Place the wrist portion of the hand down in front of you, so that the fingers are pointing up at you. Take a sharp knife and gently and slowly carve away bits of the alginate. Take care because when you run into plaster, you can easily nick or cut your cast.
When you’ve finally liberated your hand, place someplace warm (like the garage) for several days to dry completely.
DIY: A Real Hands On Craft Using Alginate momspark.net
Step 5: If you want to hang your hands on the wall, like I did, push your hangers into the backside of the cast. Even after drying for some time, the plaster will still receive the hangers easily and will stick in very well.
DIY: A Real Hands On Craft Using Alginate momspark.net
Alginate kits and plaster for this project can be purchased at CC Lowell.
We can answer any questions you have about this project! 

CC Lowell
258 Park Ave
Worcester, MA
508-757-7713


Monday, April 29, 2013

Worcester Historical Museum Crafternoons!

Kids Crafternoons at Worcester Historical Museum
- Paper Clip and Tape Necklaces

Worcester Historical Museum held a KIDS Crafternoons session for Spring Break week. Visitors of all ages were invited to explore Worcester's innovators in The Factory of the new Alden Family Gallery. What's more innovative than using something you already have in a new way? Some very creative youngsters made paper clip and colored tape necklaces. These are easy to make with materials you have around the house.


Kids Crafternoons will be back this summer so be sure to follow WHM on Facebook and visit the website at www.worcesterhistory.org.

Try this project at home with your kids!
We have a wide variety of colored tapes to chose from!

CC Lowell
258 Park Ave
Worcester, MA
508-757-7713

Monday, April 22, 2013

Duck Tape Creations!

Duck Tape Clutch Tutorial 


Materials needed: 
Duck Tape
X-Acto Knife
Velcro
Cutting Mat


First thing you need to do is make Duck Tape® fabric. 

1. You can make your clutch in as many different colors as you like. First lay out the duck tape on a flat surface sticky side up. Make sure you overlap your Duck Tape® just a little bit, so you have a strong bond.

2. Then over the top you can layer colors cool sticky side down.
3. Trim the edges with an X-ACTO knife & a ruler.

4. Now you have a great piece of Duck Tape® fabric to work with. :)

The rest is pretty easy. Fold one end up. Leaving a little on top for the clutch's flap.

Then tape up the edges.. Isn't that a fun print on the inside?

Then add some sticky back Velcro on the front flap so it will stay in place when closed.
Then add a fun handle on the clutch made with the two different kinds of Duck Tape® stuck together & trimmed down just a little.
And then your Duck Tape clutch is finished! How cute!

All supplies needed for this project can be purchased at our store.
CC Lowell
258 Park Ave
Worcester, MA
508-757-7713


Monday, April 15, 2013

Image transferring.....it's easier than it looks!

TRANSFERRING AN IMAGE WITH GEL MEDIUM

Transfer Image using Gel Medium to Wood or Canvas via lilblueboo.com

Materials:
Golden Gel Medium – Regular (Gloss or Matte)
Canvas or wood
Photocopy (mirror image)

Transferring an Image with Gel Medium via lilblueboo.com
Apply a generous coat of gel medium to the canvas.
Transferring an Image with Gel Medium step 1 via lilblueboo.com
Place your photocopy face down on the gel and smooth gently to adhere well and remove all air bubble. 
Transferring an Image with Gel Medium step 2 via lilblueboo.com
Allow the gel to dry completely for about an hour. Then dampen the back of the photocopy with water……
Transferring an Image with Gel Medium step 3 via lilblueboo.com
……and use your fingers to rub all the paper off.
Transferring an Image with Gel Medium step 4 via lilblueboo.com
The image will be left behind! Now you can seal it, paint over it….endless possibilities!

Transferring an Image with Gel Medium step 5 via lilblueboo.com
All the supplies needed for this project can be purchased at CC Lowell!
Come on down and we will help you get started! 

CC Lowell
258 Park Ave
Worcester, MA
508-757-7713

Friday, April 12, 2013

Plaster Casting Leaves

Plaster Casting Leaves Tutorial 

- Fun for Adults & Kids!

We came across this great project on Pinterest posted by Susan Myers.

This is a fun and easy project for adults, and kids ages 10 and up with help of a parent.

Materials needed for this project:
Several large leaves
Plaster of Paris
Plastic (to protect work surface)
Newspaper
Hemp cording, string, or picture hanging hardware
Step 1: First cover your table in plastic. You can use trash bags or large plastic bags.  Crunch up some newspaper to put under the upside-down leaf to support the center.  (You don’t want your leaf to be flattened by the weight of the plaster).
Step 2: Roll up more pieces of newspaper and put under the edges of the leaves in several places to create nice waves in the leaf.  You will have to use one leaf for every plaster casting as the leaves lose a ton of texture if you try to re-use them.

Step 3: Mix the Plaster of Paris with water in a plastic cup. Add enough water to make the plaster a consistency similar to yogurt. Then spoon the plaster over your leaf. Plaster does not stick to the leaf and in some cases will try to roll off, but be persistent. Try to spread it just to the edges of the leaf, creating a layer of plaster over the leaf that is about ¼  inch thick. Now at this point, add a hanger of some sort into the plaster before it dries. Now allow the leaf to dry for at least an hour. Leaves are fragile and if the plaster has not set completely, it will break into a bunch of leafy pieces. 
Now, flip your mold over and peel off the leaf.
You may have to do some trimming on the edges.  Carefully use a craft blade to score the edges and then snap off the extra in little pieces.  Keep in mind that these plaster leaves are fragile. 


Stop into CC Lowell to get your plaster supplies and x-acto knife for this project!
258 Park Ave, Worcester MA
508-757-7713

Wednesday, April 3, 2013

Revamp, Revamp, Revamp!

Hey, Folks!

So in case you were feeling too clean and pristine today, we dug up a bunch of ideas to help add more splashes (literally) of color to your life!


 This one is really just as simple as pouring paint, but we all know sometimes even the most creative types of people just need that seed planted ;) ...

The Amsterdam brand acrylics we've got would be great for this, since they are nice and affordable and thin enough to drip on their own. We've also got special tips that go with them that make it easier to control where the paint is going. Also the Pro Art Acrylics would be good for the same reason, and you can get these in 2 liter bottles with pumps if you really wanna go to town!
And this is not even to mention everything you could do with the Montana spray paint we stock...


Another quality way to spend your time is to alter clothing with all kinds of different dyeing techniques. Whether it's stuff you already have or stuff you picked up from Goodwill, Savers, Salvation Army, etc...its really pretty amazing what a little dye will do! Martha's got some pointers in the link above, but there's tons more techniques on pinterest, youtube, and the all-knowing Google to get ya goin!

And where might you find this dye? Well, C.C. Lowell of course! We have PLENTY of colors in our Jacquard Procion Dye rack, as well as the extremely user friendly IDye packets you can just throw in the washer with whatever fabric you're dying and be done with (no mess)! We know from both personal and customer experience that once you dye that first shirt, scarf, or bag you start noticing a whole new color potential in pretty much everything you own!

Speaking of new DIY/ color potential in items you may have already, we noticed bags like this one floating around the internet:


This bag has somehow has a retail value of $55,000....clearly, this value comes from its "artsy" chic quality and brand name, but as artists we know that this effect is NOT very difficult to achieve, even if you deem yourself "un-creative" or perhaps happen to be a child!
                                                                

So, whether you're into letting everyone know how artsy you are or just happen to get paint all over everything like we do, make it intentional and pick up some of our Jacquard Lumiere Fabric Paint or mix Golden brand GAC-900 Fabric Medium into any Acrylic to make it flexible and machine-washable. We also have empty spray bottles that you can use to water down these paints to get a nice splatter-effect.

And with that, get down here and start scheming about what you're gonna dye/drip/splatter today! No excuses! We now close at 7pm Wednesday-Friday, and are open on Sundays 12pm-4pm for your convenience!

:)