Monday, May 20, 2013

The Possibilities are Endless with Pebeo Fantasy Paints


The possibilities are endless.........

Pebeo Fantasy paints are fabulous and can be used on all non porous surfaces.
The Fantasy paints come in two different finishes, Prisme which has a freckled/speckled look and Moon which looks swirly.
Both have a pearlised almost metallic look and are great on metal jewellery and findings. They work very happily on many surfaces including glass, metal, wood, plastic, terracotta, shiny card ,acetate and pre-gessoed canvas.
The paint looks like a cross between nail varnish and enamel and can be painted/dropped/poured onto the surface depending on the desired thickness. The product doesn’t have to be fired or heat treated and hardens over time, touch dry in 24 hours, hardened in 72 hours and completely dry in  2-3 weeks.
The colors mix beautifully without going muddy!
The effect you get can be quite unpredictable, but always looks fantastic.
Pebeo Fantasy paints, and the jewelry seen above can be purchased at CC Lowell.
 We also sell Pebeo glass paints, glazing resin, replacement nozzles, Vitrail crackle effect, Vitrail self adhesives lead strips, relief tubes, and mixing bottles!
Come check out our full stock of Pebeo products and create something beautiful and unique!

CC Lowell
258 Park Ave
Worcester, MA
508-757-7713

Saturday, May 11, 2013

Super Simple Screen Printing Tutorial


DIY- Super Simple Screen Printing Tutorial!

What You'll Need:
  • A pre-made screen or silkscreen and an embroidery hoop
  • Screen Filler or acrylic latex paint
  • Inks made for printing on fabric
  • Sponge brush and/or screen printing squeegee  
  • Blank clothing to print on. The closer to 100% cotton it is, the better prints will turn out/take.

Step 1: Create the screen or Buy a Ready Made Screen


You can buy a ready-made screen at our store, or you can make your own screen.

For this, you can use a basic plastic embroidery hoop in whatever size you need for the design, and stretch some silkscreen material through it until it's taut like a drum. 

You can also buy rolls of actual screen printing fabric. I line the inside edge (where the hoop meets the screen) with blue painters tape, so that my filler paint and fabric inks don't get the hoop itself all messy.


Step 2: Create the design


You can draw the design by hand, or make it on the computer, then print it out. Then trace it onto the screen lightly in pencil with the screen laying flat on the paper.


Step 3: Fill the screen


Fill out the screen - in other words, block out all the negative space that won't be printed, leaving only the design unpainted

You can purchase items for this process at our store. This is by far the step that takes the most amount of time, particularly if it's a design with lots of small details. Do two coats, and check the screen by holding it up to the light to make sure there are no tiny holes missed. Let the screen dry overnight before doing any printing with it.


Step 4: Print!


Once you got the screen done, decide which piece of clothing I'm going to print on, mix up the color ink you want with different fabric inks, and print. 


The screen goes face-down on the area of the clothing you want to print,  use a layer of cardboard inside the piece of clothing so that if the ink leaks through it doesn't spread to the back of the shirt or whatnot. 


Also just use a sponge brush to apply the ink, pressing very firmly. If you have a small enough squeegee to fit into your hoop size, that is also a good method. But either way you need to make sure your pressure is mostly downwards, not sideways, so the ink gets pressed through the screen and not just moved around on top. Once ink is applied, lift the screen off the fabric, and immediately wash it and the brush fabric inks are water-soluble... until they dry. If the ink is left to dry in the screen, it becomes unusable again. 


If needed, you can touch up areas of the print with a small paintbrush. If you are going to do multiple colors/layers of prints on the same shirt, do all of one color at once, and let that dry (both the ink on the shirt, and the screen you washed out) before doing the next layer/color. Don't proceed to Step 5 until all printing on your shirt is done.


Step 5: Heat-set the ink

This might be the most important step. Once the design is on the shirt and looking great, and the ink has dried, grab an iron and a spare piece of cotton fabric for an interface, and iron BOTH sides of the design on medium-high heat. 


So, once with the shirt right side out, and once with the shirt inside out. Each side gets this treatment for 3-5 minutes. This binds the ink to the fabric, and makes it so it won't come out when you wash it (remember how they're water-soluble? Not so, after this step). It's important to use a cloth interface when ironing on the ink, because otherwise you will end up with a sticky mess of melted ink on your iron.

Step 6: Sport new duds proudly


The new piece of clothing with a custom design is ready to be worn!


-Thanks to Acute Designs for this great little tutorial!

- - -> Silkscreen, pre-made screens, screen printing inks, squeegees, and all other screen printing supplies can be purchased at CC Lowell.

CC Lowell
258 Park Ave
Worcester, MA
01609
508-757-7713

Monday, May 6, 2013

DIY Plaster Hands Using Alginate

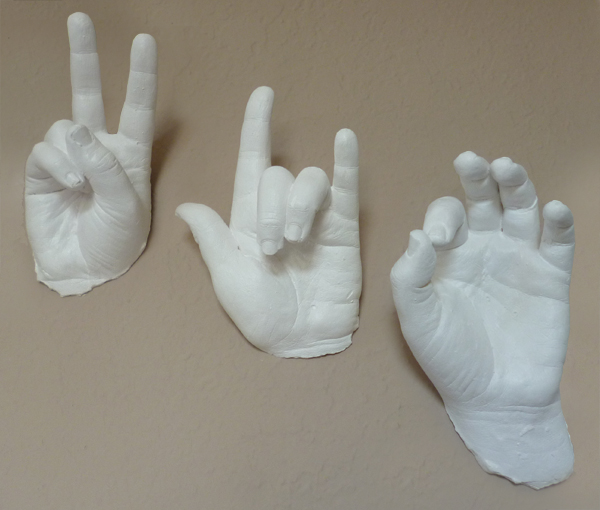
DIY Plaster Hands with Alginate!
DIY: A Real Hands On Craft Using Alginate momspark.net
SUPPLY LIST:
pitcher
dry measuring cup
liquid measuring cup
wooden spoon
disposable bowl
alginate
plaster of Paris knife
self adjusting (sawtooth) picture hangers with spikes to push in
DIY: A Real Hands On Craft Using Alginate momspark.net
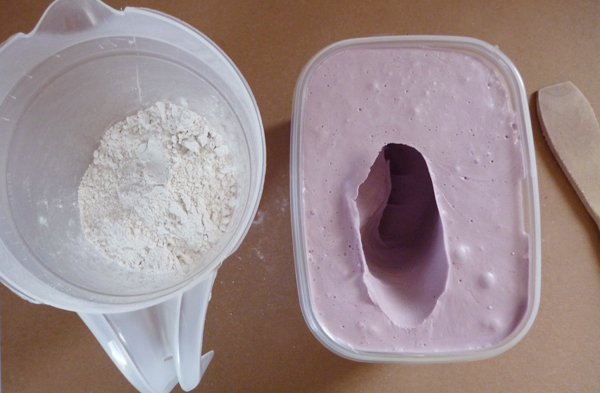
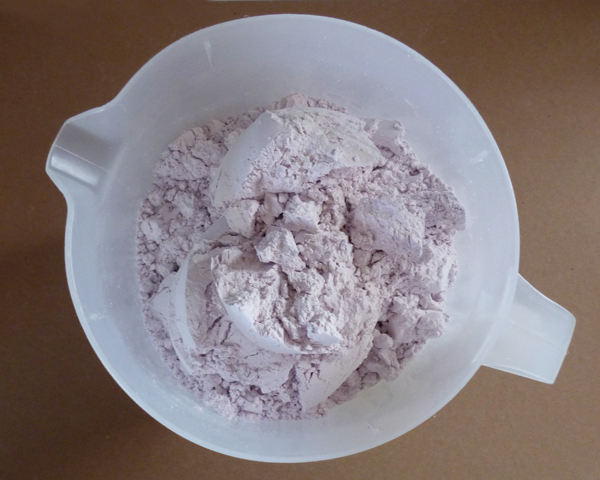
Step 1: First things first – mixing your alginate and transferring it to your container you will be making the mold in. The manufacturer recommends that you use in a 1:1 ratio with water. For my 8 cup container, I used 7 cups of water and 7 cups of alginate. First pour your water into your pitcher and then follow with your alginate powder and stir vigorously. It will begin to set pretty quickly, so really get it stirred quickly. When you are happy that there are no lumps of powder remaining, pour into your mold container.
DIY: A Real Hands On Craft Using Alginate momspark.net

Step 2: Place your hand into the goo. I mean alginate. Make sure that your model’s hand is not touching the bottom or sides. Also be sure not to go into the goo up to the wrist or beyond. You’ll need to go only as far as the wider portion of the hand – go to the wrist and you may not get out of it. Make your model move their fingers around to make sure that you have alginate settles into all of the little pockets and crevices a hand will make.
Sit tight, about 10 minutes or so, as still as possible while the mold begins to set around the hand. Feel the top of the alginate from time to time. When it’s firm to the touch, your model can remove their hand. First, wriggle the fingers around to loosen and then carefully pull the hand completely out of the mold.
DIY: A Real Hands On Craft Using Alginate momspark.net
Step 3: Mix your plaster of Paris per manufacturers suggestion. Slowly pour the liquid into your mold. About halfway through, roll around the bowl to try and help the plaster up into all of the nooks and crannies. *** NEVER put hands directly into the plaster to form a mold. It won’t work and you’ll lose a finger!

DIY: A Real Hands On Craft Using Alginate momspark.net

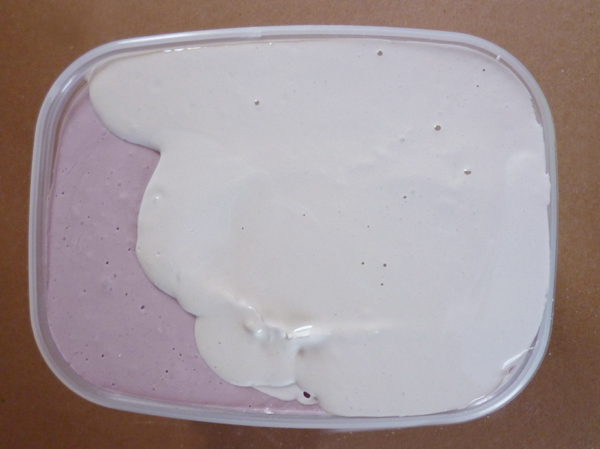
Allow the plaster to fully cover the hole – you can break away the extra later – so no worries there. Finish filling up and tap around the sides of the bowl with your wood spoon to help break up any air bubbles in the mixture.
Move the mold someplace warm for about 4 hours. Most plaster says 1 is adequate but I say the longer the better. Besides – the first hand I did fell apart and that was only an hour. Play it safe!
*** When cleaning your pitcher and utensil you used to mix your plaster, DO NOT wash it out in your sink. Take it outside with the hose. You will encounter some nasty plumbing issues if plaster of Paris sets up in your pipes!

DIY: A Real Hands On Craft Using Alginate momspark.net

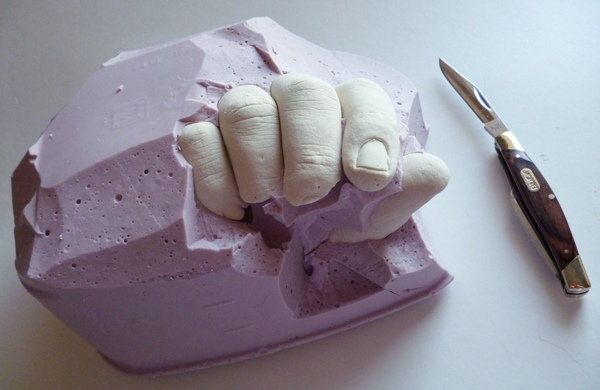
Step 4: Loosen and remove your mold and cast from its container. You may want to go around and use a towel and soak up any excess moisture that is left on the surface. Place the wrist portion of the hand down in front of you, so that the fingers are pointing up at you. Take a sharp knife and gently and slowly carve away bits of the alginate. Take care because when you run into plaster, you can easily nick or cut your cast.
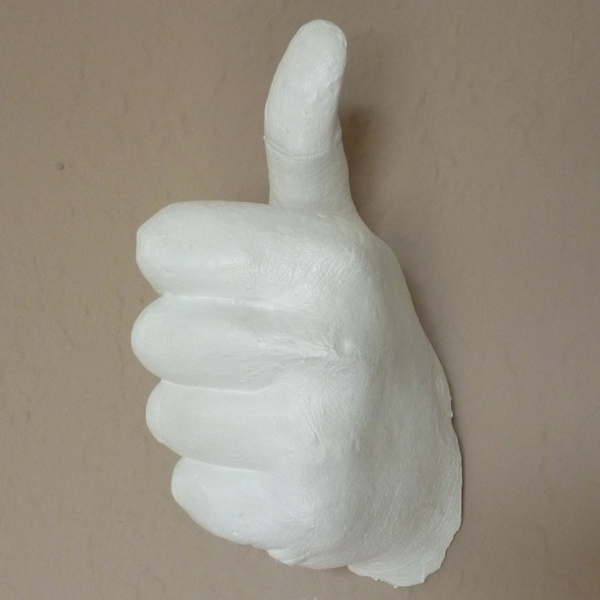
When you’ve finally liberated your hand, place someplace warm (like the garage) for several days to dry completely.
DIY: A Real Hands On Craft Using Alginate momspark.net
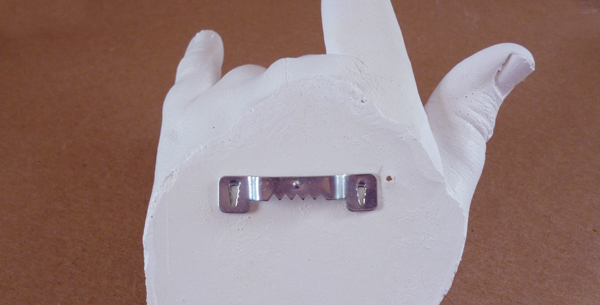
Step 5: If you want to hang your hands on the wall, like I did, push your hangers into the backside of the cast. Even after drying for some time, the plaster will still receive the hangers easily and will stick in very well.
DIY: A Real Hands On Craft Using Alginate momspark.net
Alginate kits and plaster for this project can be purchased at CC Lowell.
We can answer any questions you have about this project! 

CC Lowell
258 Park Ave
Worcester, MA
508-757-7713