
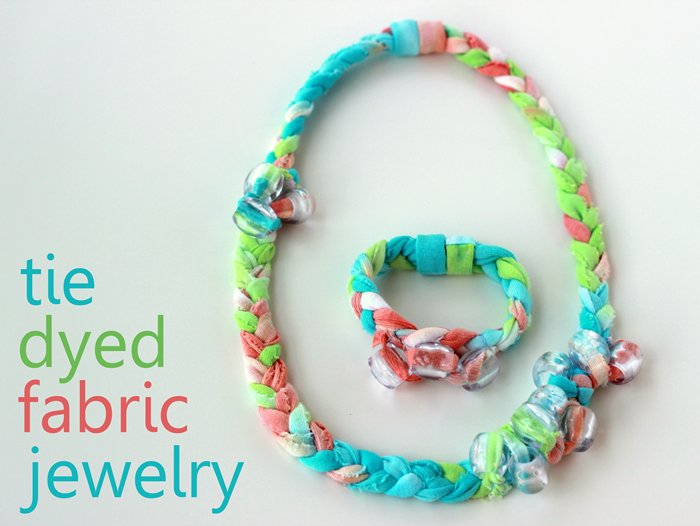
Summer fun with tie dye!
Materials:
- White cotton shirt
- Beads, any color you want!
- Needle and thread
- Craft glue
- Strong ceramic magnets
- Tie Dye kit and supplies
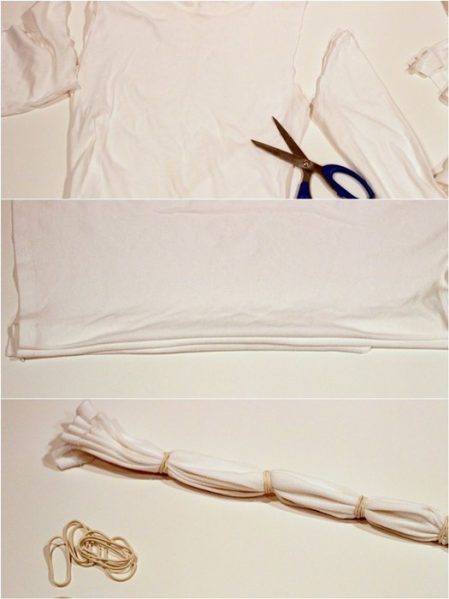
If you are using a new garment, be sure to prewash your fabric. I cut apart two old tees and used the front and back panels of each shirt for my project. When you are ready to dye, dampen your fabric. Pleat the fabric lengthwise and wrap rubber bands tightly every 3-5 inches to create stripes. Repeat the process for all of the panels of fabric.
Step 2: Mix & add your dye
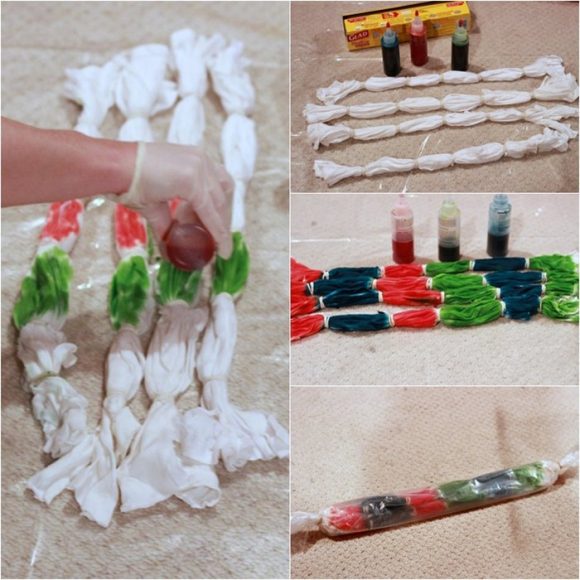
Lay your tied fabric on a plastic surface protector. Wearing gloves, pick out your favorite colors and mix each color in the bottles as directed by the instructions. Carefully apply each color to the desired sections with dye. Be sure to flip your fabric over to get the other side and do not oversaturate the sections.
Tightly wrap your fabric in plastic (I just wrapped the surface protector around the fabric) and allow the dye to set for at least 4-6 hours.
Step 3: Rinse & wash.
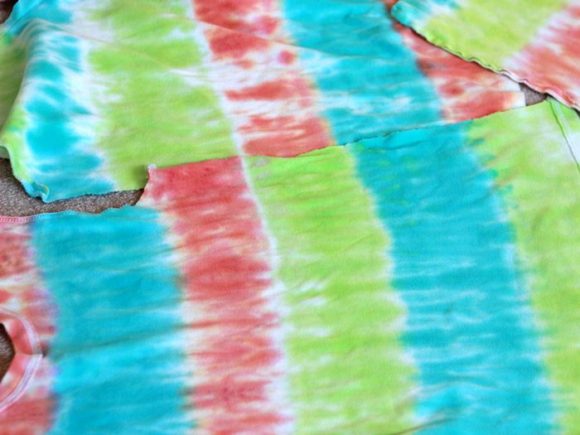
Now for the exciting part! You will start to get an idea of what your tie dyed pattern looks like after you carefully unwrap your tied fabric. (Again, wearing gloves!) Rinse out the remaining dye and wash the fabric in your washing machine and dry it.
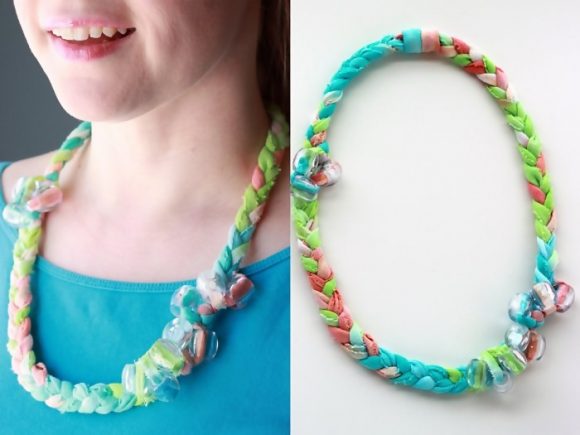
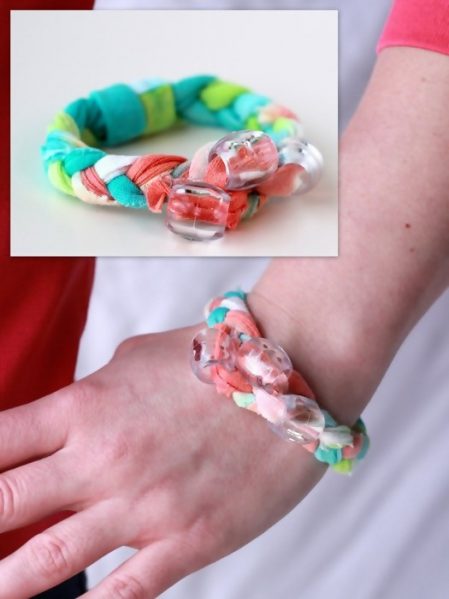
Now let’s use this fun fabric to make a pretty necklace and bracelet!
Step 4: Cut fabric strips for your necklace
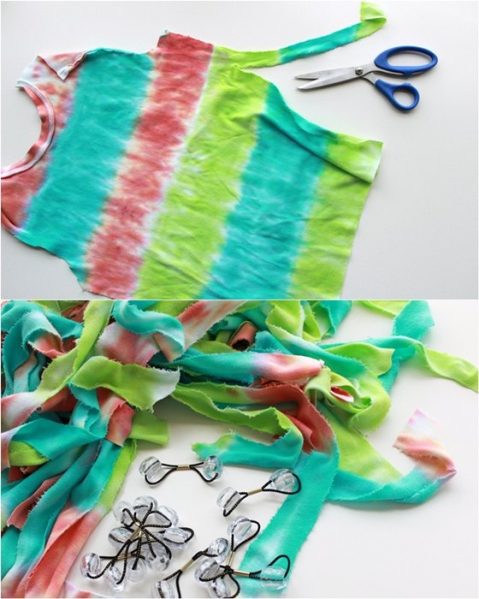
Using scissors, cut approximately 1” wide strips of fabric from your dyed tees. It does not need to be perfect, since you will be braiding it. I like how the frayed edges added texture to the pieces. Depending on how long you want your jewelry to be, one t-shirt should be plenty to create enough strips to make a long necklace and one bracelet.
Step 5: Braid your fabric
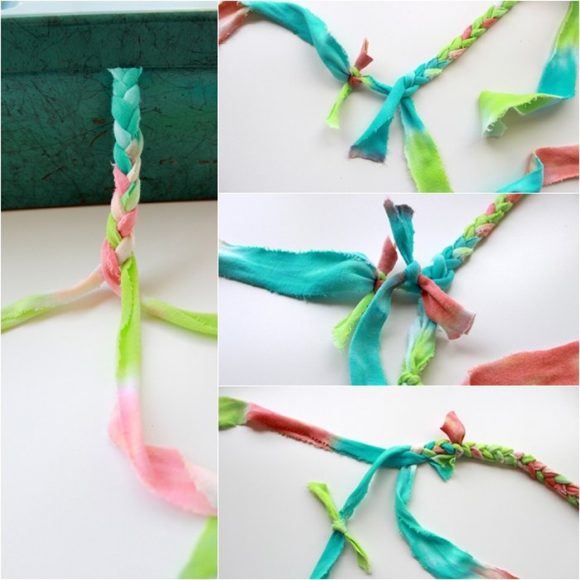
Take 3 strips of fabric and tie a knot at one end. Secure the knot down (with a clip board or under a box lid like I did) and start to braid your strips. When you get to the end of each strip, just tie another strip onto each piece. Keep braiding and adding fabric until you reach well beyond your desired jewelry lengths. (It is better to have a little extra.)
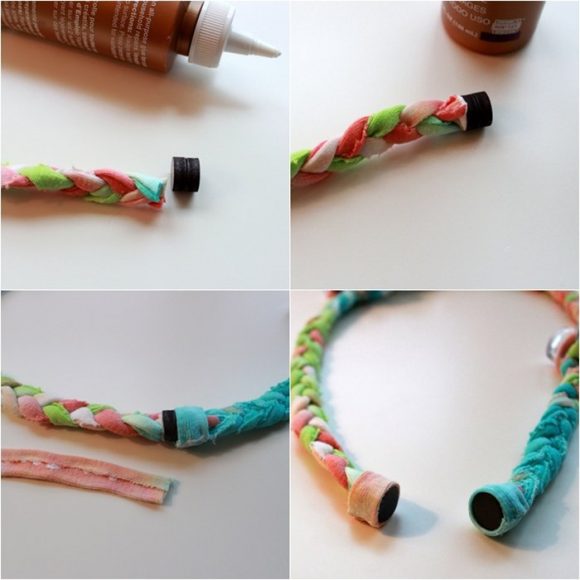
Step 6: Attach your magnet closures.
Carefully consider where the fabric knots are on your length of braid. We will be adding beads to those sections in the next step and you want the placement to make sense when you cut your braid down to create a necklace.
Measure how long you want your necklace or bracelet to be. (My necklace was ~24 inches and the bracelet was ~7 inches long.) Trim the braid and attach the fabric ends to a magnet with glue. Repeat on the other end.
(I should warn you that these magnet closures are not super-duper secure. They will hold up to wear, but if someone pulls on the necklace or bracelet, the piece will fall off. If you are worried about that happening, just make a necklace long enough to fit over your head and tie a permanent knot in the two ends instead.)
After the glue on the magnets dry, take two small strips of fabric and fold each one over with adhesive for a finished look. Wrap a folded strip around the magnets on each end and attach them with more glue so the fabric edge is flush with the magnet surface.
Step 7: add beads!
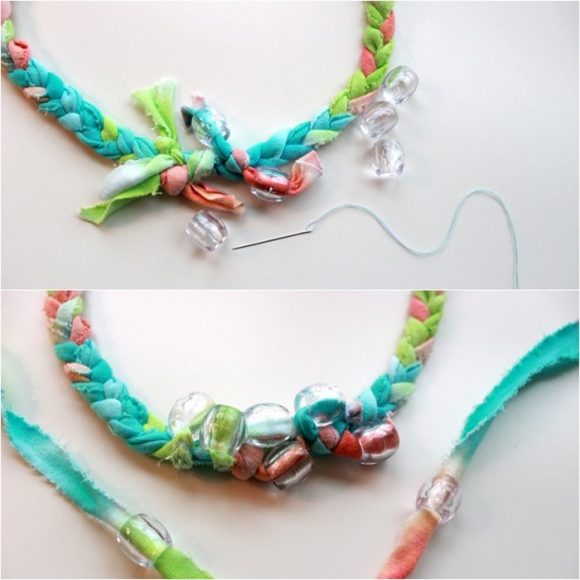
If you want, you can add clear bead to sections of the jewelry. Where there are knots and fabric ends, string a clear bead over the loose fabric end. Use needle and thread to tack the fabric strip down to the necklace. To add a few more beads to any “empty” spots, take a small strip of fabric and tied another bead around the braid in the desired area (sewing any loose ends down, too).
You might choose to use a solid color bead instead, but I like how you can still see the color of the fabric and pattern through the clear beads.
Once the beads are added you can just put your braided jewelry on and enjoy your modern tie-dyed creations!
Wear one around the neck …
Various kinds of Tie Dye supplies and craft glue can be purchased at CC Lowell!
CC Lowell
258 Park Ave
Worcester, MA
508-757-7713

Awessome blog you have here
ReplyDelete